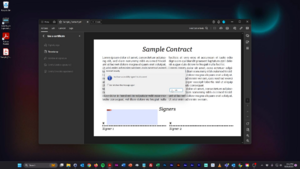
Install ScripTouch Adobe Reader Plugin and Signing a PDF on Windows
Jump to navigation
Jump to search
Video Tutorials
Install ScripTouch Adobe Acrobat Reader Plugin and Signing a PDF on Windows Tutorial
Instructions
Before You Begin, You'll Need:
- The latest version of Adobe Acrobat Reader installed. NOTE: Acrobat Reader must be installed before Sign and Save.
- A Scriptel ScripTouch signature pad.
- The latest version of ScripTouch Sign and Save installed. Need help? Check out the link to our handy guide: ScripTouch Sign and Save installation.
Step 1: Set Adobe Preferences
- Open Adobe Reader.
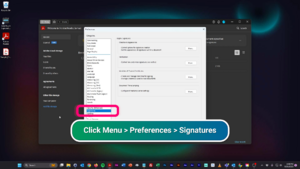
- Click Menu > then Preferences > Signatures
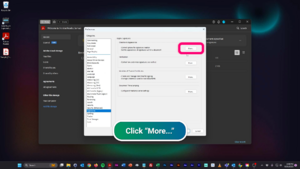
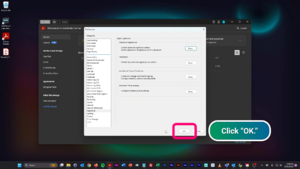
- In the "Creation & Appearance" section, click "More..."
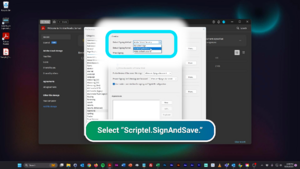
- For the "Default Signing Method," select "Scriptel.SignAndSave."
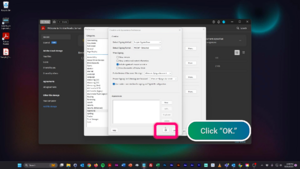
- Click "OK" to close the "Creation & Appearance" section.
- Click "OK" to close the "Preferences" section.
Step 2: Plug in a ScripTouch Signature Pad
Plug one of our signature pads into your computer to use the software.
Step 3: Sign a PDF Document
- Open the Adobe PDF document you want to sign.
- If you don't see the "All Tools" menu, click the link in the toolbar.
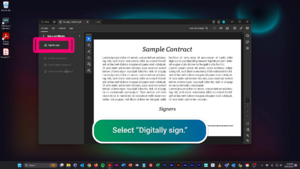
- Look for "Use a Certificate" and click it. Expand the list, if you need to.
- Click the "Digitally Sign" documents icon.
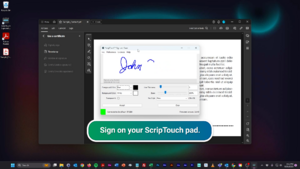
- Use your mouse to draw a rectangle where you want to place your digital signature.
- Sign on your ScripTouch pad.
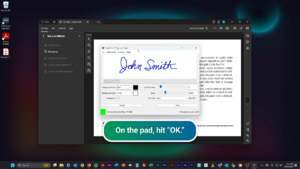
- Click the "OK" button when you are done signing.
- Adobe Reader will tell you that your signature was successfully applied. Hit "OK."
The document is now saved with the new signature.

