Install ScripTouch Remote with ScripTouch Sign and Save on Windows: Difference between revisions
Jump to navigation
Jump to search
No edit summary |
No edit summary |
||
| Line 3: | Line 3: | ||
'''Installing ScripTouch Remote with ScripTouch Sign and Save on Windows'''</div> | '''Installing ScripTouch Remote with ScripTouch Sign and Save on Windows'''</div> | ||
How to | ==How to Install ScripTouch Sign and Save with ScripTouch Remote== | ||
'''Video instructions follow:''' | '''Video instructions follow:''' | ||
| Line 12: | Line 12: | ||
#:<div style="padding:1rem;">[[File:Install Remote Step 2.png|300x300px]]</div> | #:<div style="padding:1rem;">[[File:Install Remote Step 2.png|300x300px]]</div> | ||
#Once the download finishes, run the installer. | #Once the download finishes, run the installer. | ||
#Click "Install" to begin the installation. | #Click '''"Install"''' to begin the installation. | ||
#:<div style="padding:1rem;">[[File:Install Remote Step 4.png|300x300px]]</div> | #:<div style="padding:1rem;">[[File:Install Remote Step 4.png|300x300px]]</div> | ||
#If the User Account Control dialog appears, click "Yes." | #If the User Account Control dialog appears, click '''"Yes."''' | ||
#:<div style="padding:1rem;">[[File:Install Remote Step 5.png|300x300px]]</div> | #:<div style="padding:1rem;">[[File:Install Remote Step 5.png|300x300px]]</div> | ||
#Read and agree to the ''End-User License Agreement.'' | #Read and agree to the ''End-User License Agreement.'' | ||
| Line 20: | Line 20: | ||
#Choose a custom installation, if desired. | #Choose a custom installation, if desired. | ||
#:<div style="padding:1rem;">[[File:Install Remote Step 7.png|300x300px]]</div> | #:<div style="padding:1rem;">[[File:Install Remote Step 7.png|300x300px]]</div> | ||
#Click "Install" to begin the installation. | #Click '''"Install"''' to begin the installation. | ||
#:<div style="padding:1rem;">[[File:Install Remote Step 8.png|300x300px]]</div> | #:<div style="padding:1rem;">[[File:Install Remote Step 8.png|300x300px]]</div> | ||
#When the installation has completed, click "Finish." | #When the installation has completed, click '''"Finish."''' | ||
#:<div style="padding:1rem;">[[File:Install Remote Step 9.png|300x300px]]</div> | #:<div style="padding:1rem;">[[File:Install Remote Step 9.png|300x300px]]</div> | ||
ScripTouch Sign and Save with ScripTouch Remote is now installed. | '''ScripTouch Sign and Save with ScripTouch Remote is now installed.''' | ||
Revision as of 07:26, 17 October 2023
Installing ScripTouch Remote with ScripTouch Sign and Save on Windows
How to Install ScripTouch Sign and Save with ScripTouch Remote
Video instructions follow:
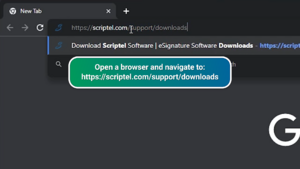
- Open a browser, and navigate to: https://scriptel.com/support/downloads.
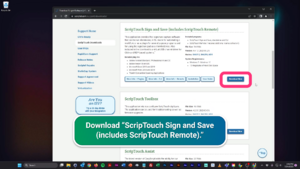
- Scroll down the page, and click the "Download Now" button for ScripTouch Sign and Save.
- Once the download finishes, run the installer.
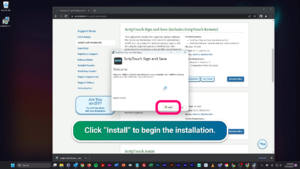
- Click "Install" to begin the installation.
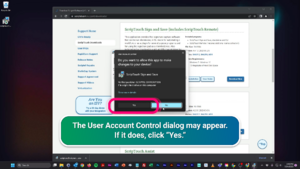
- If the User Account Control dialog appears, click "Yes."
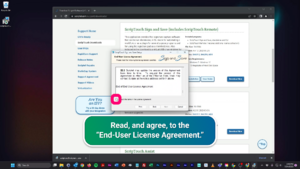
- Read and agree to the End-User License Agreement.
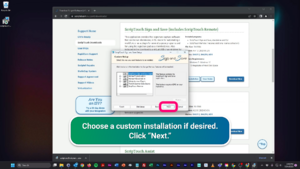
- Choose a custom installation, if desired.
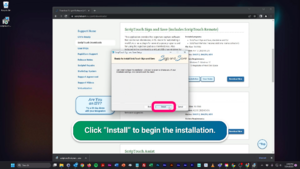
- Click "Install" to begin the installation.
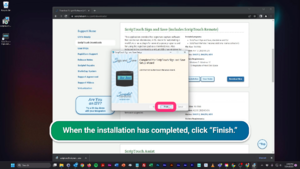
- When the installation has completed, click "Finish."
ScripTouch Sign and Save with ScripTouch Remote is now installed.
